I always wanted to make a 3d object like a statue. But knowing me, I wanted to make a reusable mold of it so I can reproduce copies of the original. The original being a 3D printed statue which of course has to fit in my large format (11.5″x12″) SLA printer. I used to think that most of the work to produce one of my items was obviously in the 3D modeling step. Now, I am about to revise that to consider the mold-making step. The Bastet statue below was a purchased item rather than a created one by me. This was going to be my ‘practice’ for my first brush-on mold.

If a crafter wants to make a mold of a small statue today, it will require a brush-on silicone jacket mold with a hard mother mold shell. The reason it requires the brush-on method is that there is no parting line in the final casting because the silicone part of this mold is brushed on in layers completely surrounding all dimensions and surfaces and is ‘de-gloved’ at demold time. This leaves no parting line to sand down, which could be an issue with very fine detail that we want to retain.
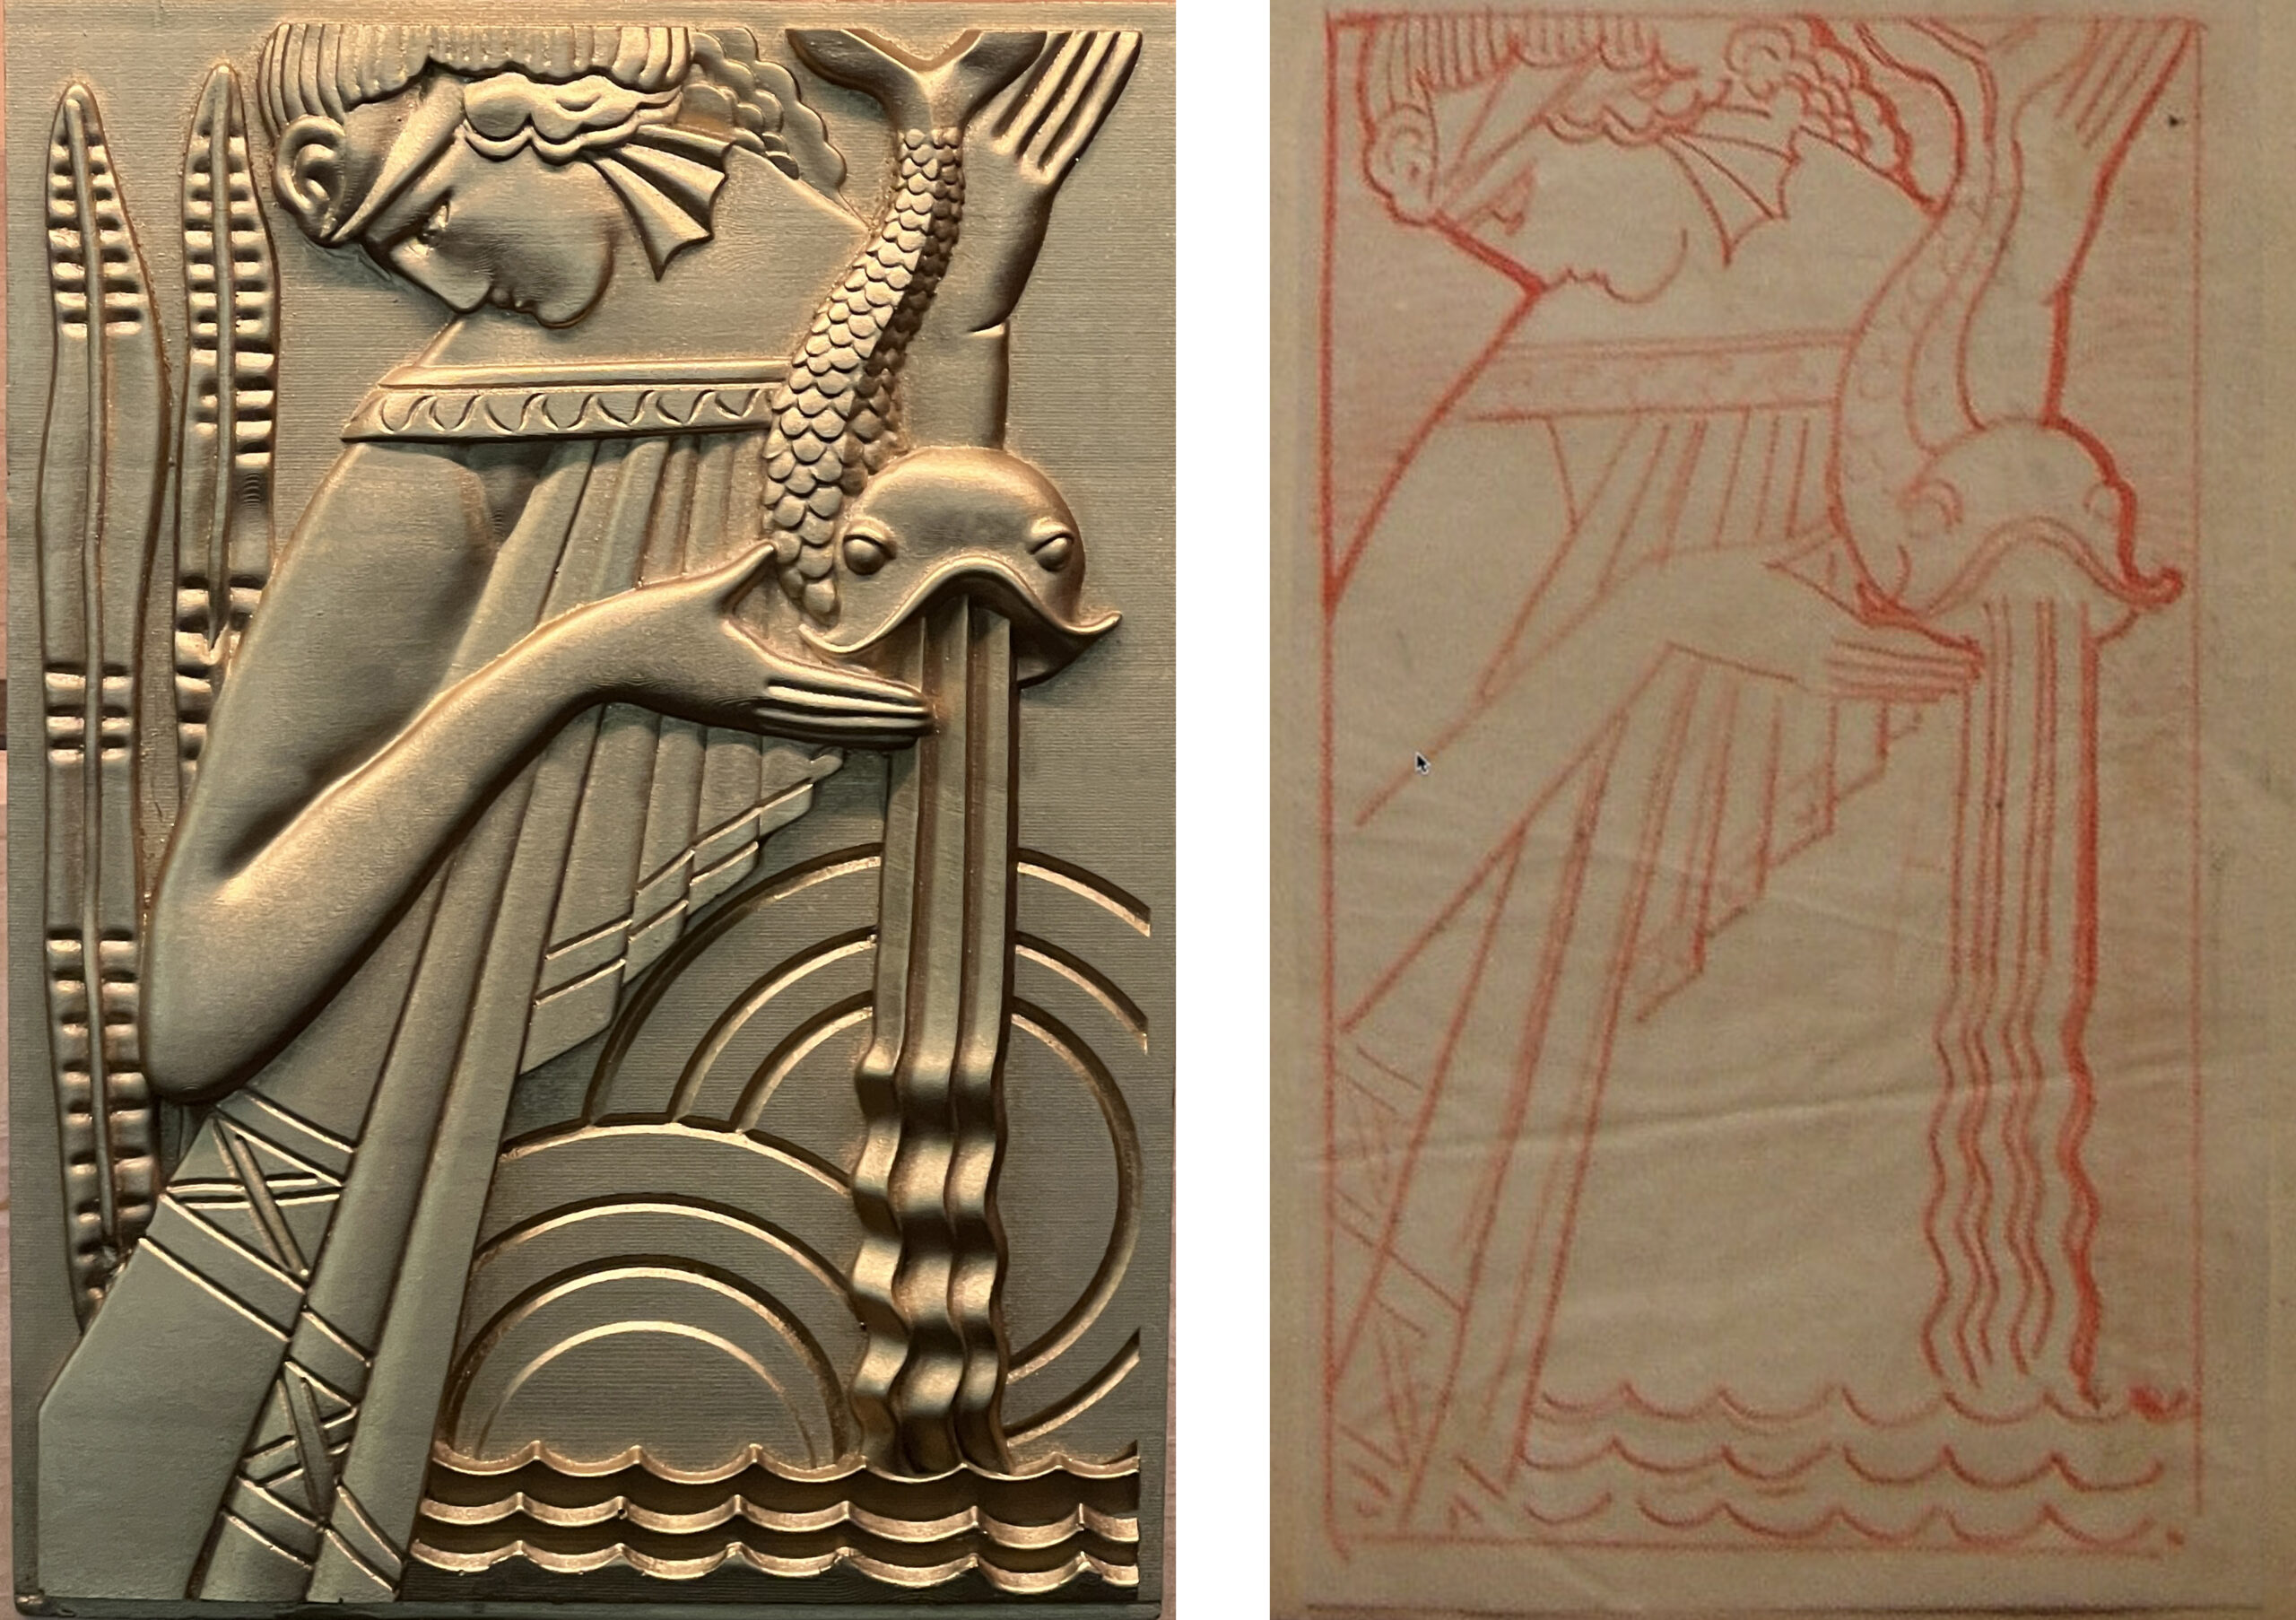
It needs to be said that the art-deco statues I want to offer will have very fine detail like hair, dress pleats and other flourishes found in the art-deco pantheon. The silicon will easily and faithfully capture those and with a mother mold shell, the plaster pour will be able to fill the silicone mold and expand out until it hits the shell and stops. This allows the thin inner silicon to stay in place while the plaster reaches into all of the detail within.


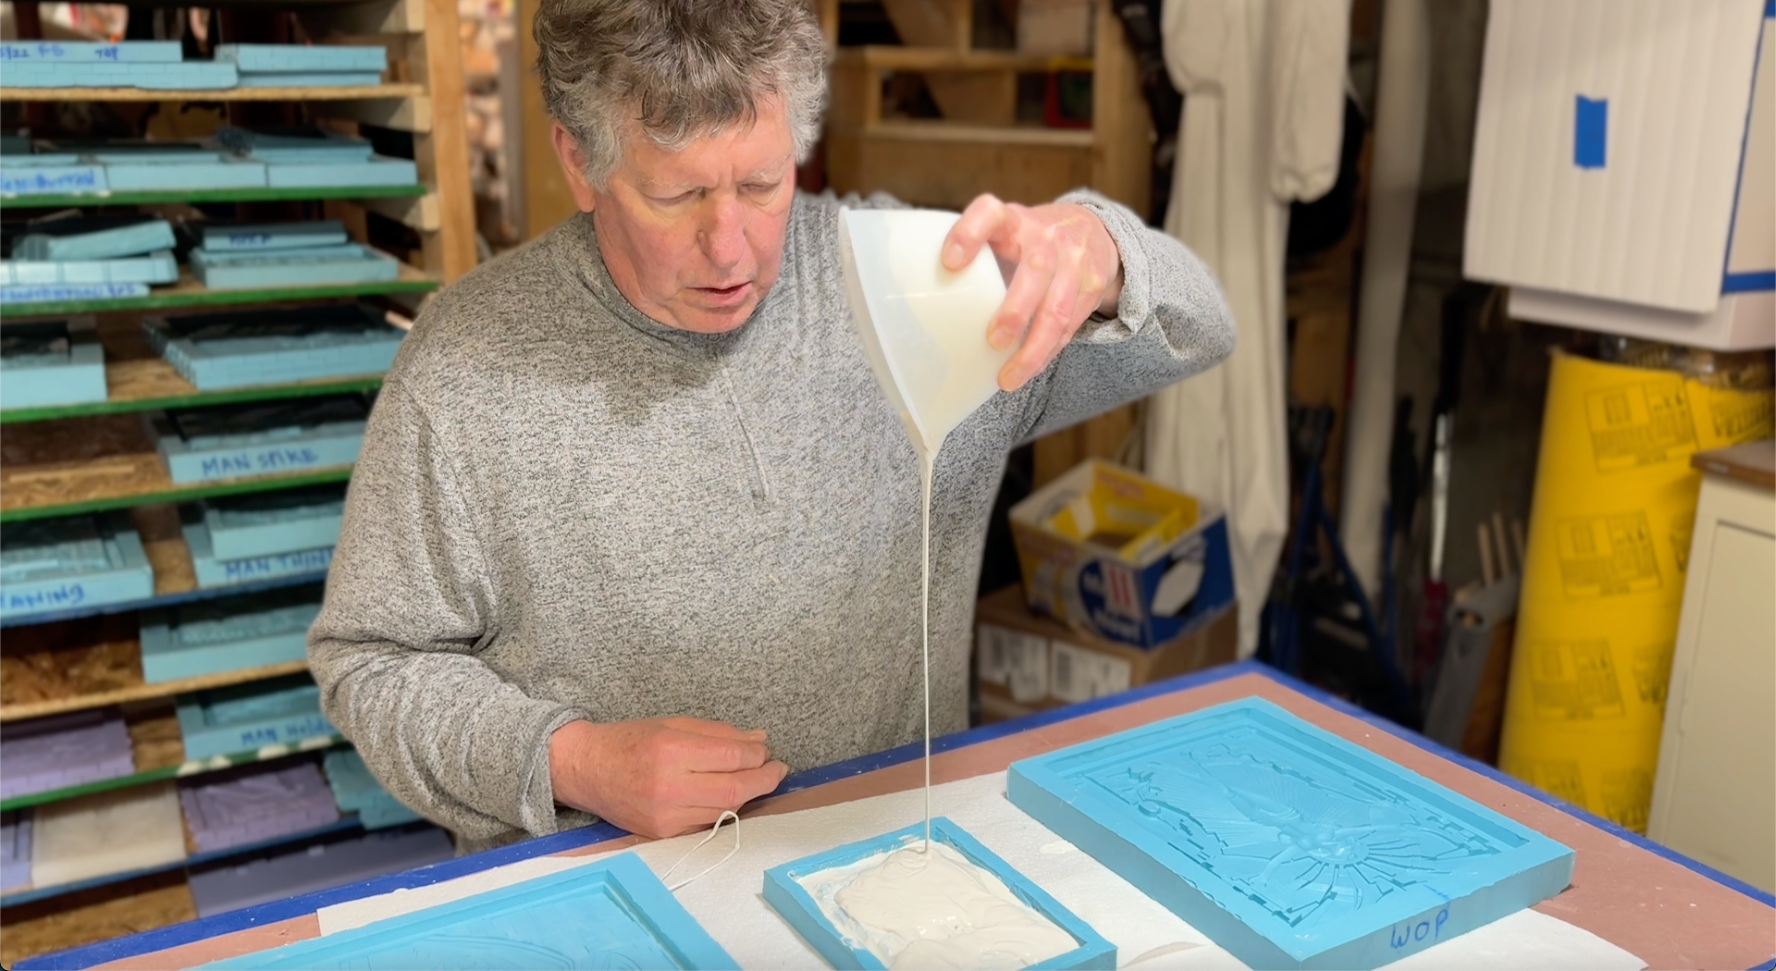
Going back to my concept of the most effort for the process, I can easily say that applying the rubber layers, setting mold release stages, applying both plaster and plaster bandages adds up to a day and half of hacking around with onerous materials that are not always cooperative. The viscosity of the rubber is more like honey and drips and spills all over the place and the plaster is trying to dry while you are applying it so there are some challenges. There is an add-in that thickens the silicone so in higher layers, you can expect peanut-butter viscosity which is easier to gob on. At 4 or 5 layers, you now have a very reliable ‘jacket mold’ which needs to have the mother mold built up around it. I just finished the mother mold and now I wait for it to cure. At some point, I will try to split the mother mold and remove the model from the silicone jacket and then I will be ready to cast some plaster in this.
At this point, I should share that early on, I modeled one of the Martel cats and molded it with a huge two-part block mold. It took over a gallon of Oomoo-25 to make this and the resulting mold was 10 lbs easily. Being split, I ended up having to sand the parting line down for each copy and that was no fun. I did sell a few but took it off the market eventually because of lack of interest in both sales and my having to deal with that crazy mold. Had I taken the brush-on mold approach in the first place, I may have been able to fabricate them easier and charge a little less for the quicker production.
When I have finished my first cast with this, I will add the results on to this post/
Update! The plaster and bandages did not work. When going to separate the mother mold sides, the whole thing disintegrated and peeled apart like sand. So, I will be redoing the mother mold with Smoothon Plasti-Paste which is much more rigid and easier to apply thick in layers. I will also be making a larger clay wall with built-in keys to make the shell lock in. Fingers crossed for now. My next challenge will be to see if I can demold the marble model of the cat after I remove the completed mother mold.
Update: I am going back to a cut block mold where I can virtually eliminate any parting lines going down the side of the casting. Will be back soon with the results and more photos.
Update: I have taken my new statue, Art-Deco Woman of Power and created a two-part block mold. Although I had to adjust the straws to allow air to push out with plaster pushing in, I think I am at the finishing line. My first attempt with the new mold was to have air replacing plaster in the casting which resulted in arms being cut. I will add straws in strategic places to allow the air to leave so plaster can fill it. Next update will show the results.